Microfeed relies on Cloudflare's D1 database to store metadata. If you set up a Microfeed instance last year or earlier, it's likely running on the D1 alpha version. Recently, Cloudflare announced plans to discontinue and eventually delete databases created with D1 alpha. To keep your existing Microfeed instances functioning, migration from the alpha to the production version of D1 is necessary.
This guide will walk you through the process of migrating your Microfeed D1 alpha database to the production version.
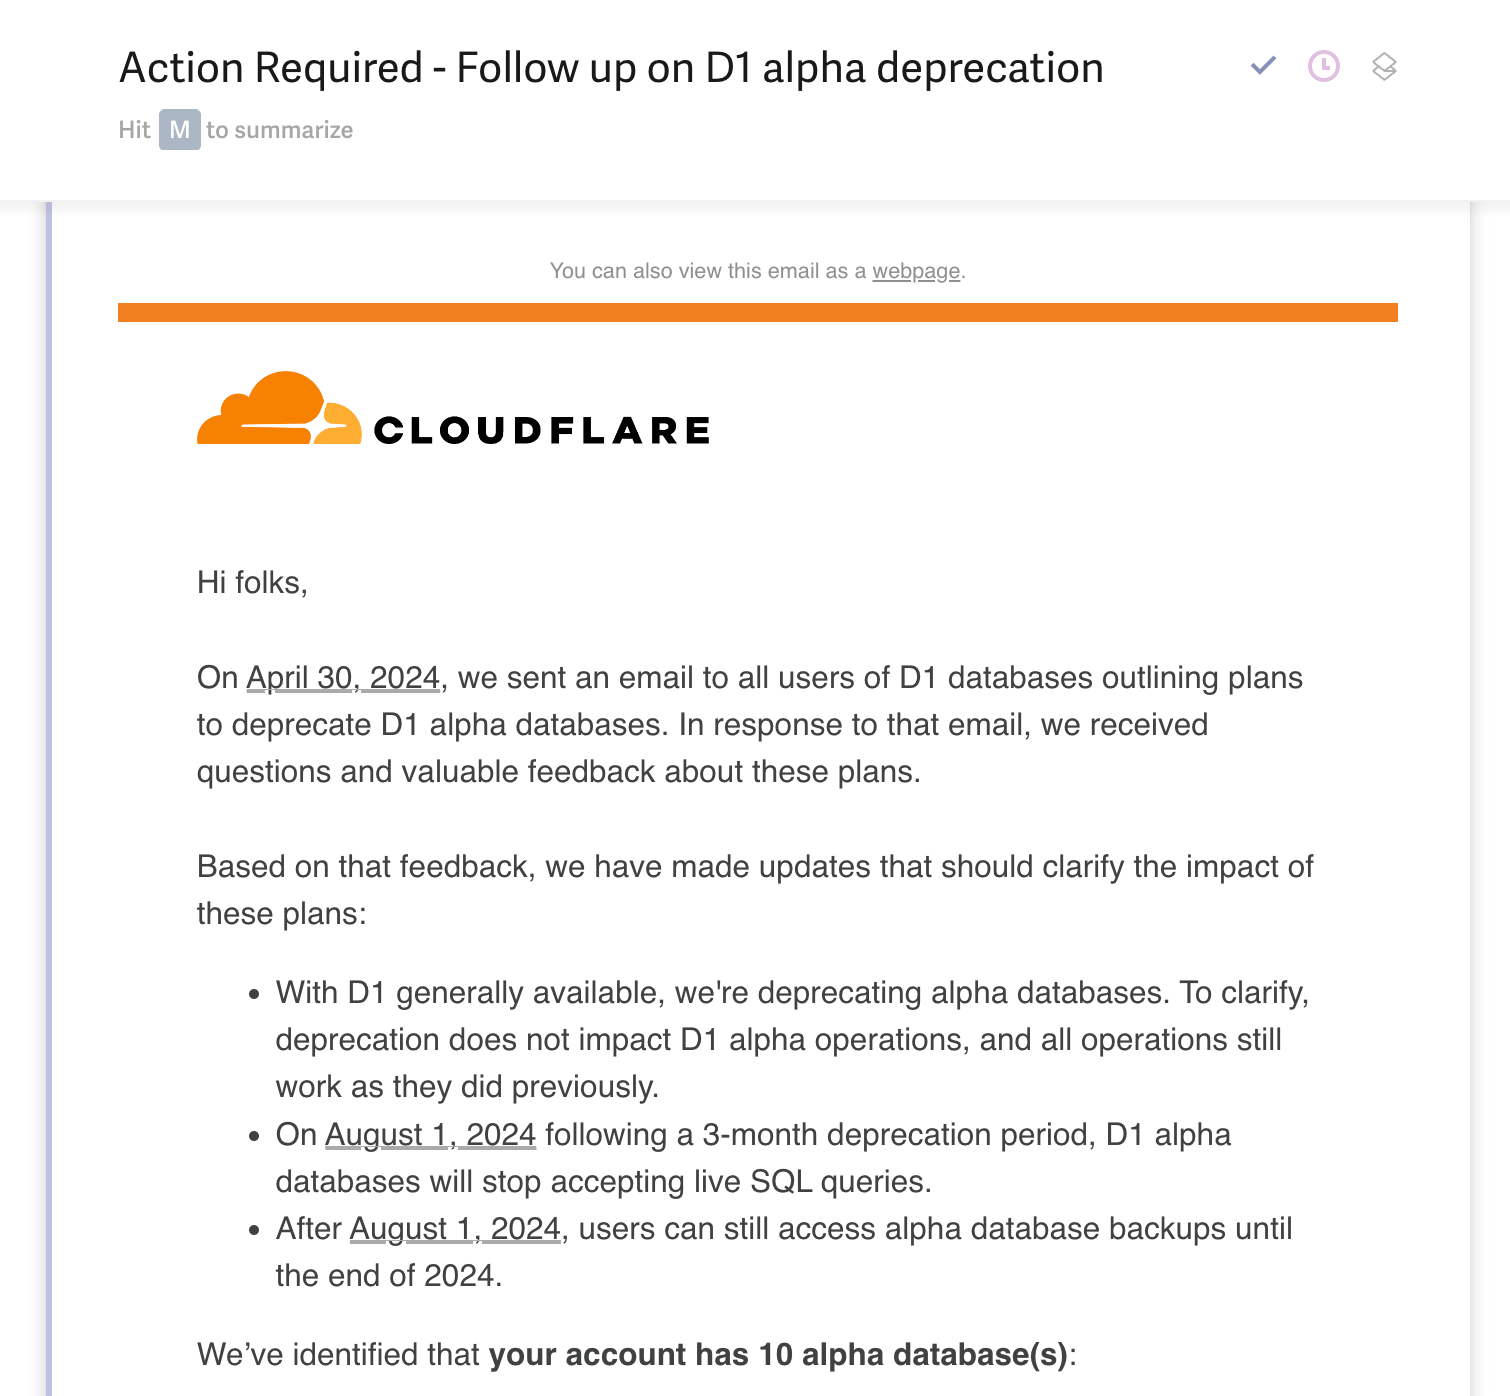
Email Notification from Cloudflare
Cloudflare has sent out notifications regarding the depreciation and subsequent deletion of D1 alpha databases. This announcement necessitates action from our users to prevent any loss of functionality.
Migration Steps
Migrating your database involves two primary steps:
- Copying your existing D1 database to a new one.
- Configuring your Microfeed instance to connect to the new database.
Step 1: Copy Your Existing D1 Database
The migration process begins with creating a copy of your current database:
- Export your existing database to SQL: Use the Wrangler CLI to authenticate with wrangler login.
- Identify your existing database: Run wrangler d1 list and wrangler d1 info <database_name> to confirm it's an alpha version.
- Create a backup: Execute wrangler d1 backup create <database_name> and download the backup with wrangler d1 backup download <database_name> <backup_id> --output db.sqlite3.
- Generate an SQL dump: Convert the downloaded SQLite3 database file into an SQL dump using sqlite3 db.sqlite3 .dump > db.sql.
With the SQL dump ready, proceed to set up a new D1 production database:
- Create a new database: Run wrangler d1 create <new_database_name>, appending _v1 (or _new) to differentiate from the alpha version.
- Restore data: Import your SQL dump into the new database with wrangler d1 execute <new_database_name> --remote --file=./db.sql.
- Verify creation: Confirm the new database setup by checking with wrangler d1 info <new_database_name> and manually inspecting data via your Cloudflare dashboard.
Step 2: Update Your Microfeed Instance
Reconfigure your Microfeed instance to connect to the new database:
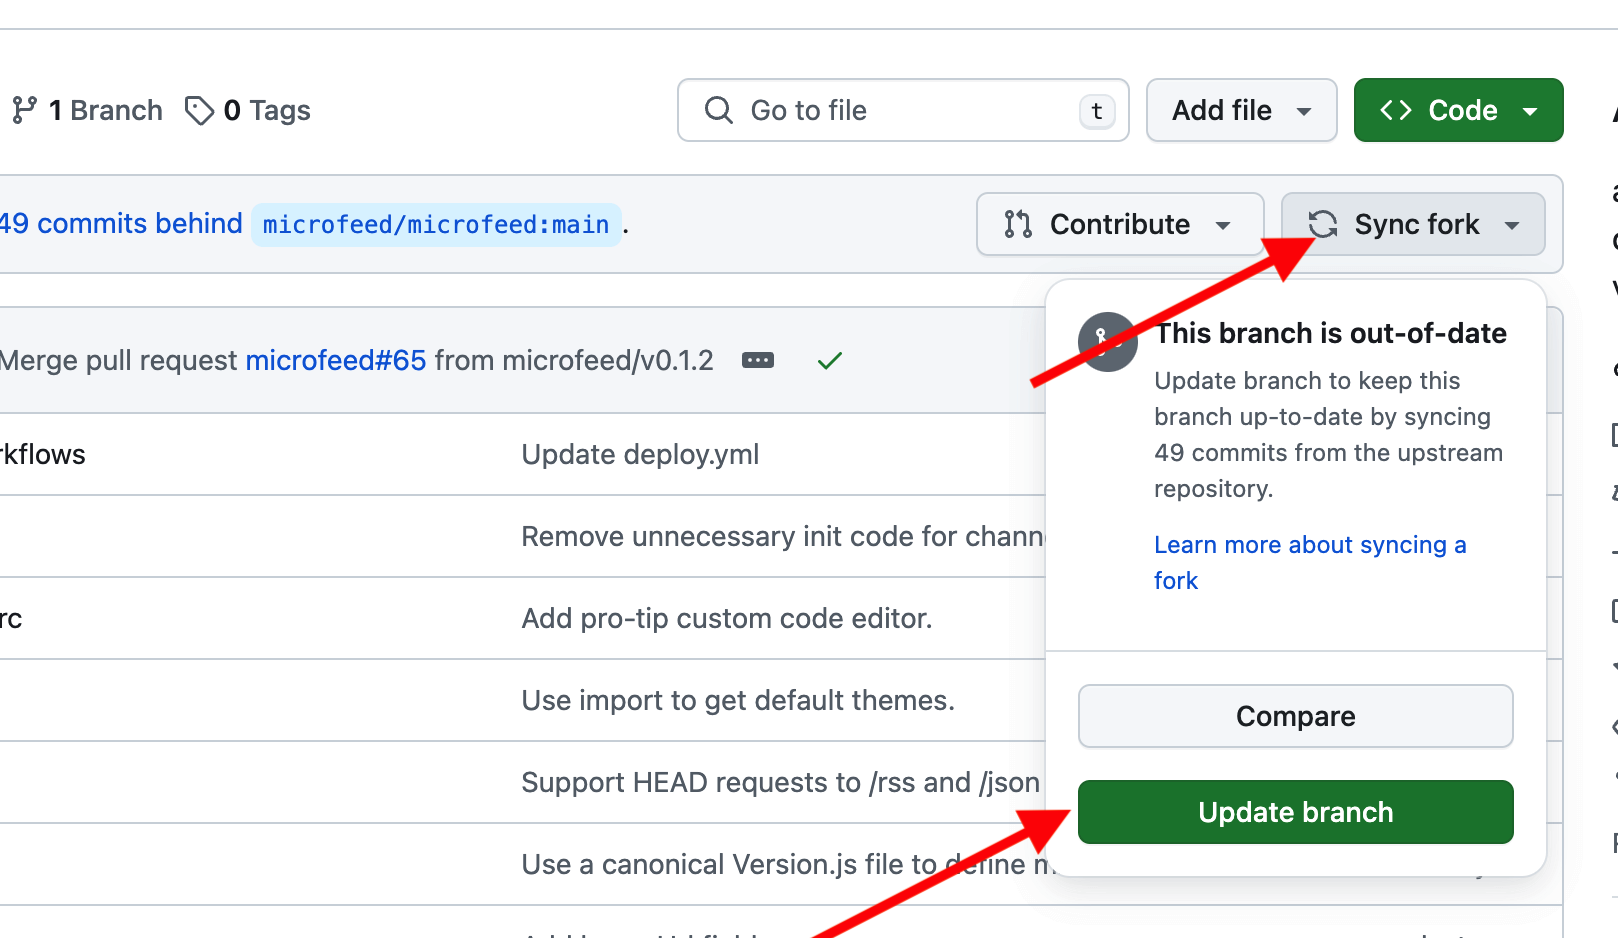
1) Update your codebase: Ensure your Microfeed fork is up-to-date on GitHub.
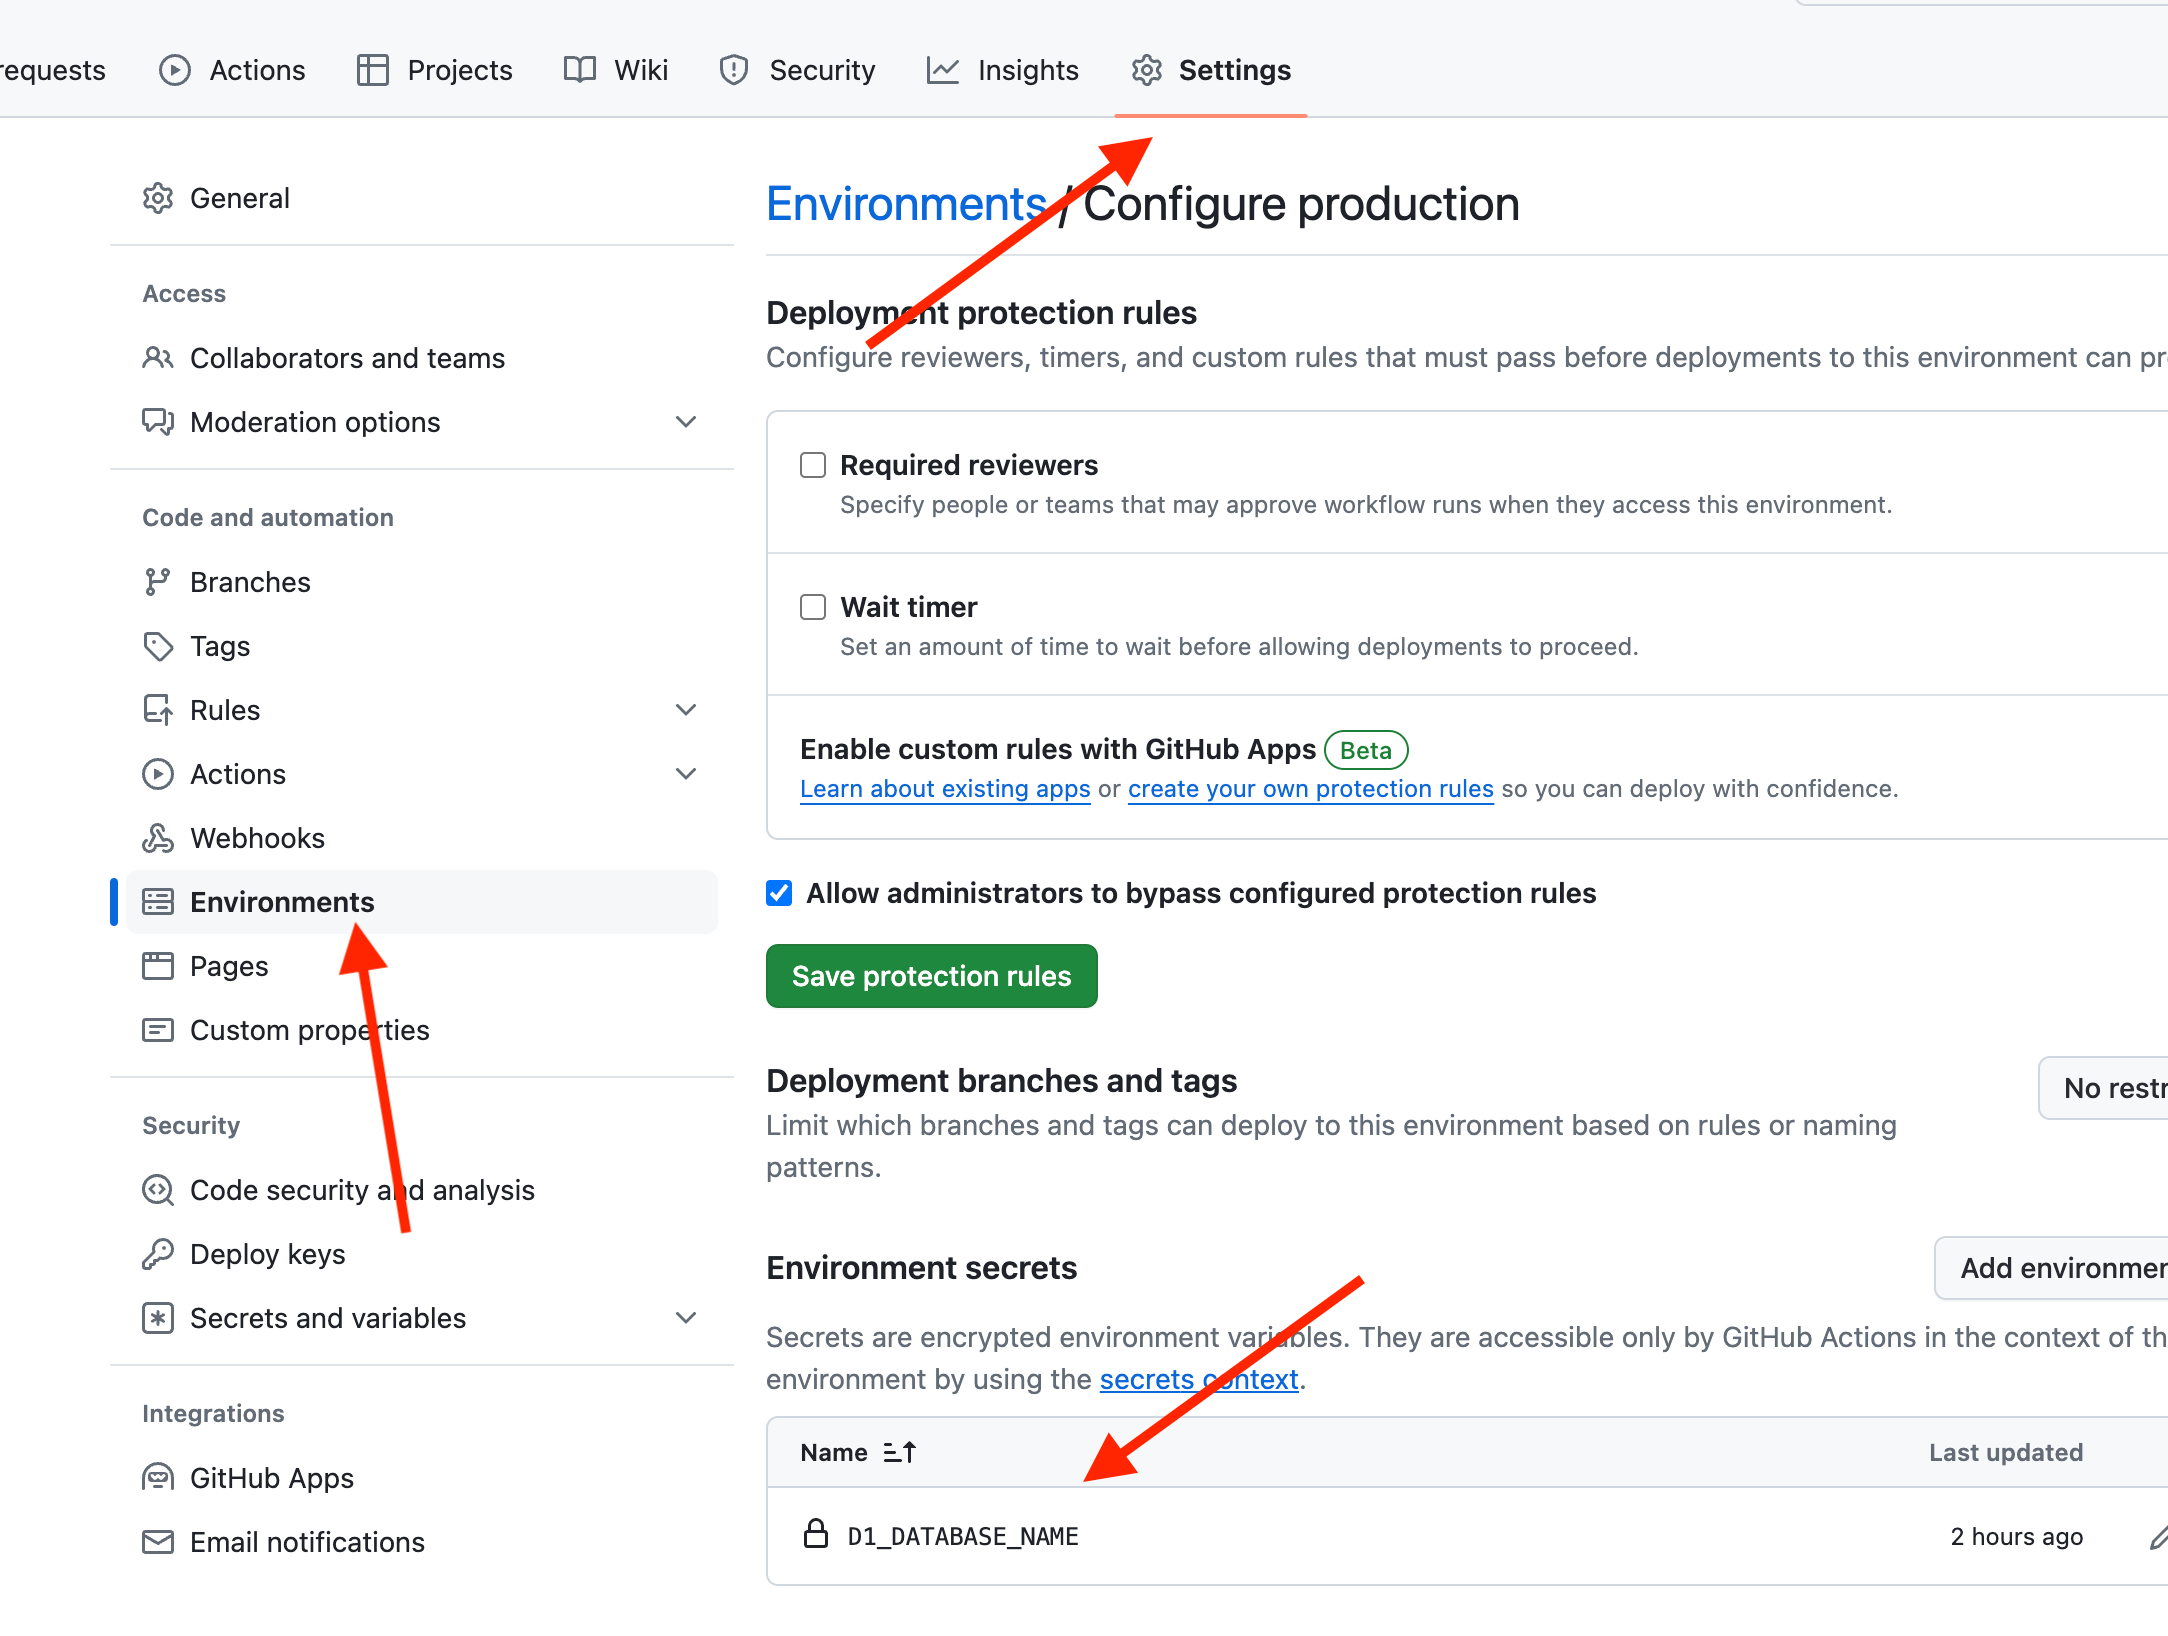
2) Set a new environment secret: Add the D1_DATABASE_NAME secret on GitHub with the name of your new D1 database (<new_database_name>).
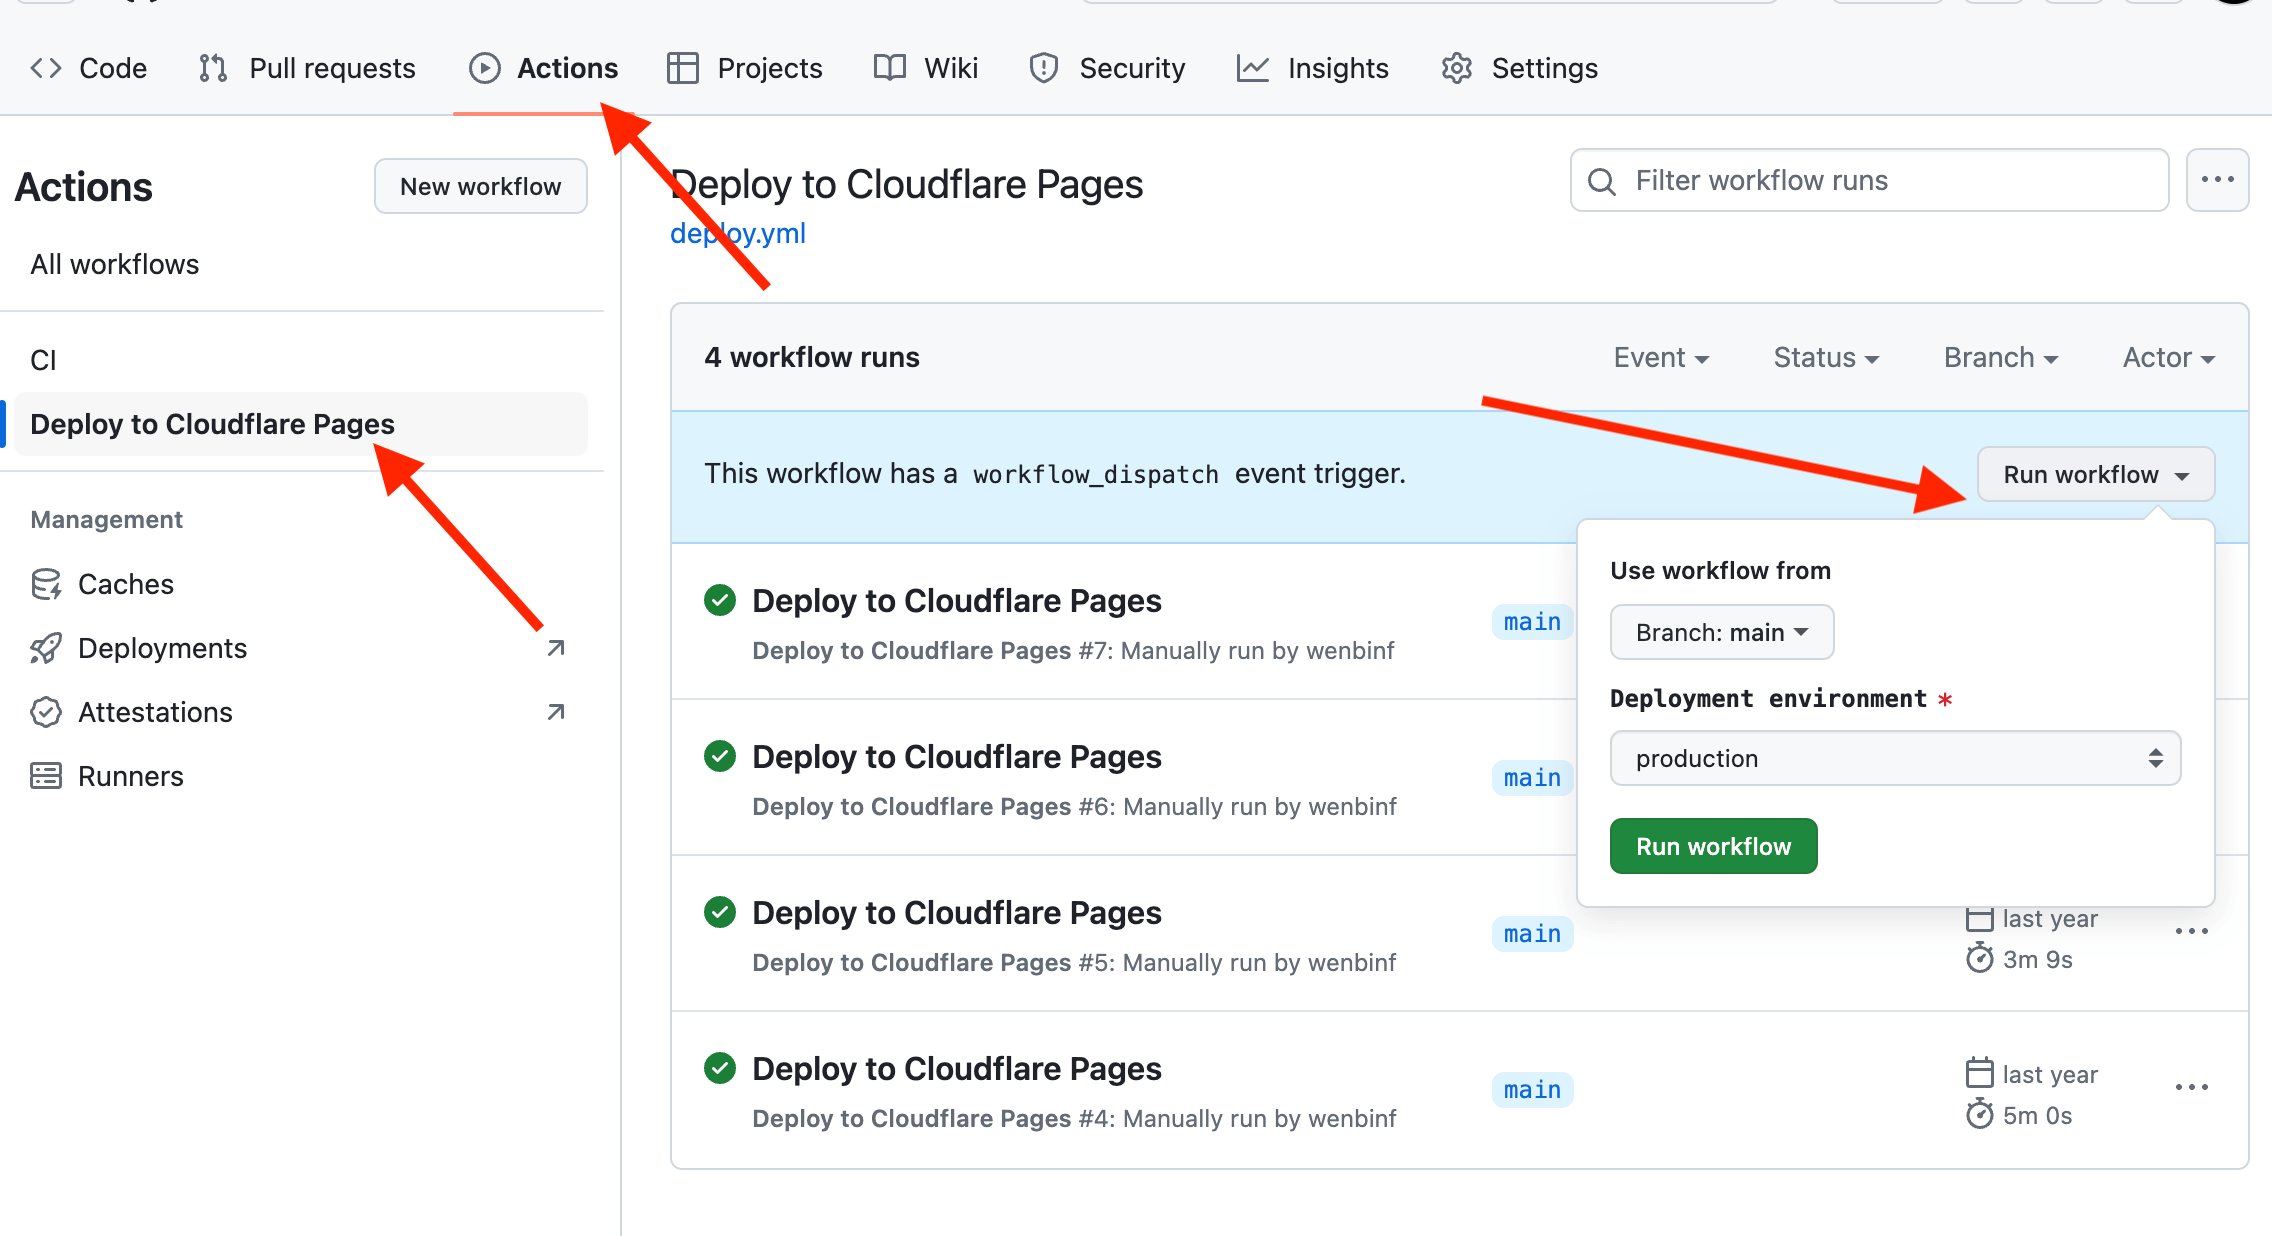
3) Deploy changes: Re-deploy your Microfeed instance by triggering the deploy GitHub action.
Testing and Validation
After migration, create an unlisted item in your Microfeed admin panel to verify that the new item appears in the new D1 database. This test confirms that the migration was successful.
Conclusion
Unfortunately, Cloudflare does not provide a one-click solution for this migration. However, following these detailed steps should guide you through the process smoothly. If you encounter any issues or have questions, please reach out to us at [email protected]. We're here to help ensure your transition is as seamless as possible.